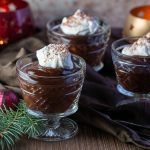
Easy Microwave Chocolate pudding
Easy Microwave Chocolate Pudding is a rich and silky dairy free dark chocolate dessert made in less than 5 minutes in the microwave with only five ingredients. (Vegan and Gluten-free)
Servings: 4
Calories: 159kcal
Ingredients
- ½ cup sugar
white granulated - ⅓ cup unsweetened cocoa powder
- 3 tablespoons cornstarch
- 2 cups almond milk
or dairy of choice - 2 teaspoons vanilla pure extract
Instructions
- In a microwave-safe bowl, whisk together sugar, cocoa and cornstarch. Whisk in almond milk a little at a time so that so you do not have any lumps. (no one likes lumpy pudding)
- Put it in the microwave and cook for 3 minutes on high. Stir, then cook at 1-minute intervals, stirring between cooking times for 2 to 4 minutes (or until shiny and thick). Stir in vanilla. (We cooked our pudding in the microwave for 4 minutes total.) Each microwave heats a little differently. Microwave a minute at a time and stir in between and be patient) Your goal is to have a pudding that is thick enough to be scooped on a spoon. After the initial 3 minutes in the microwave, you will need between 1-3 minutes to achieve this goal. Please note that your pudding will thicken slightly as it sits.
- Place a piece of plastic wrap directly on the surface of the pudding to prevent a skin from forming, and chill in the refrigerator. (This is a very important step. Unlike the instant kind of pudding, the cooked kind of pudding will form a skin)
- Place your Easy Microwave Chocolate Pudding into individual cups and top with a little Homemade Coconut Cream or fruit and nuts as desired. Enjoy!
- Best enjoyed within 24 hours. Refrigerate any leftovers for up to 3 days then dispose.
Notes
Make sure you either sift or breakup any lumps in your dry ingredients. Dry ingredients like unsweetened cocoa powder, can get little clumps in it as it sits on the shelf. That is bad news for your pudding. The goal is to a smooth and creamy chocolate pudding. Don’t skip this step.
Add the non- dairy or dairy of choice in very slowly while whisking. This helps prevent the clumping that might occur.
Every microwave is different and has a different power level. However, on high power for 1 minute each time with a stir in between took us only 4 minutes in the microwave.
When you put it in the microwave for the first minute, your pudding will form these thick larger lumps. That is to be expected just stir and whisk to incorporate before microwaving your pudding for the second minute. Then, repeat the process
Your goal is for the pudding to just pull together into a slightly thickened pudding. Now as you stir it, it will start to get thicker and thicker after you pull it out of the microwave. Actually, you could eat your pudding hot out of the microwave. However, it is just as delicious chilled, if you can wait for a little while before eating. Then this pudding is really delicious with a dollop of our Homemade Coconut Whipping Cream on top To prevent a skin from forming on the top of your pudding, you must put a piece of plastic wrap directly over your pudding, so it is not exposed to air. We have put the vanilla in before the microwave process and after the microwaving and there was no change in taste if you use “real vanilla extract”. However, if using imitation vanilla extract, then we would add it after the microwaving process so that it does not change its flavor.
Your goal is for the pudding to just pull together into a slightly thickened pudding. Now as you stir it, it will start to get thicker and thicker after you pull it out of the microwave. Actually, you could eat your pudding hot out of the microwave. However, it is just as delicious chilled, if you can wait for a little while before eating. Then this pudding is really delicious with a dollop of our Homemade Coconut Whipping Cream on top To prevent a skin from forming on the top of your pudding, you must put a piece of plastic wrap directly over your pudding, so it is not exposed to air. We have put the vanilla in before the microwave process and after the microwaving and there was no change in taste if you use “real vanilla extract”. However, if using imitation vanilla extract, then we would add it after the microwaving process so that it does not change its flavor.
Nutrition
Serving: 1small bowl | Calories: 159kcal | Carbohydrates: 35g | Protein: 2g | Fat: 2g | Saturated Fat: 1g | Sodium: 165mg | Potassium: 109mg | Fiber: 3g | Sugar: 25g | Calcium: 159mg | Iron: 1mg
