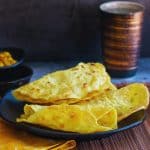
Instant Rice Flour Dosa
Try our gluten free instant rice flour dosa for an easy Indian breakfast. Extra crispy with cornmeal and corn flour and without any grinding or fermentation.
Servings: 8 dosa
Calories: 92kcal
Equipment
- pan large non-stick or very well seasoned iron skillet
Ingredients
Dosa
- ¼ cup cornmeal gluten-free
- 1 cup hot water boiled
- 1 cup cold water plus extra on side - used to cool and equalize temperature of pan
- ¾ cup rice flour gluten free
- 1 teaspoon salt or to your preference
- oil for frying
- ½ tablespoon curry powder optional - ours had turmeric
- 1 teaspoon coriander powder optional
- 1 teaspoon dried red pepper flakes optional
- fresh herbs optional - (fresh cilantro, green onions or evenly finely grated onion or carrot)
Instructions
Instant Dosa Batter
- Add the cornmeal to a large bowl and add 1 cup of boiled water. Stir and allow to slightly thicken – just about 3 minutes. This allows the cornmeal to stay suspended in the liquid instead of settling down to the bottom of the bowl.
- Add 1 cup cool water and then gradually add in the rice flour and cornstarch and mix well to remove any lumps. The consistency is thinner than a crepe batter but thick enough so that it barely coats the back of a spoon.
- Season with salt and dried ground spices like cardamon, curry powder, dried red pepper flakes or any spices desired. Stir well and set aside.
Cook Gluten-Free Dosa
- NON-STICK PAN DIRECTIONS - Heat a large non-stick pan, skillet, or tawa to a low medium heat. Pour approximately ½ ladle of the gluten free dosa batter in a dry pan. (Do not add oil in the non-stick pan before adding the dosa batter as this will cause uneven cooking) WELL SEASONED IRON SKILLET DIRECTIONS - Rub oil lightly in the iron skillet or iron tawa between each and every dosa. Use ½ of a cut onion with a little oil on it to disperse the oil evenly.
- Turn the burner heat to a LOW medium heat. Measure out approximately ½ ladle of batter. Pour the dosa batter in the middle of the pan.
- Use the back of the ladle to spread the dosa batter lightly in a spiral circle starting in the center and move outward to the exterior. This procedure is used to thin the batter to get it extra crispy. (If you want to sprinkle on finely diced fresh cilantro (coriander) leaves, minced onions or even grated carrot do it now quickly while the batter is still wet.)
- Turn up the heat to medium. Wait 30 seconds for the dosa batter to start cooking. Then, add a little oil or ghee around the edges of the instant dosa. Once the steam has stopped rising from the dosa and there is browning around the rings, the dosa can be flipped to brown on the other side, if desired.
Adjusting Heat Measures (Don't skip!)
- When you are ready to make another gluten free dosa, remove the pan from the heat and turn the burner down to LOW medium. Add a small amount of water to the empty pan and swirl it around. (This procedure evens out the cooking temperature of the pan and cools it. )
- Wipe out the excess water and return the pan to the LOW medium burner. If you are using an "iron skillet", use the ½ onion to a small amount of oil to the bottom of the pan. On the other hand, if you are using a "non-stick skillet", do NOT add oil - you will once again add the dosa batter to a dry pan.
- Add another ½ ladle of instant rice flour dosa batter to the pan. Use the back of the ladle to spread the dosa batter lightly in a spiral circle starting in the center and move outward to the exterior. Repeat the process until you have used up the dosa batter or your family is full.
Video
Notes
Dosa Batter Tips
- The consistency of the instant dosa batter should be a little thinner than a crepe but not so thin it is watery. It should be pourable but not so liquid that the liquid runs to the edge of the pan. Nor should it be so thick that you can’t spread it. Check out our video and see how it just gently coats the back of a spoon. The perfect consistency is a batter that is thick enough to spread evenly with the back of the ladle but thin enough to get crispy.
- Dosa batter may start to thicken up if it sits longer than ½ hour. You may need to add a tablespoon of water to thin it back out to achieve that perfect consistency.
- Don’t let the pan get too hot! The pan or tawa should be on a low medium heat when pouring the batter. This is so you have time to thin it out with the back of the ladle. If the temperature is too high, the batter will cook and harden before you have a chance to thin it out.
- Once you have the dosa spread out, you can increase the heat to medium.
- Wait about 30 seconds before adding oil around the edges of the dosa. If you add the oil right away before the dosa has a chance to seal around the edges, it will get messy.
- Be quick, gentle, and diligent while using the back of the ladle to thin out the dosa pancake. Practice makes perfect. If you do it too hard you will puncture the batter. On the other hand, if you do it too gentle the dosa will be too thick.
- If you create a small hole while trying to thin out the dosa, don’t sweat it. It’s all part of the learning process and will still taste delicious.
Nutrition
Serving: 1dosa | Calories: 92kcal | Carbohydrates: 16g | Protein: 1g | Fat: 1g | Saturated Fat: 2g | Polyunsaturated Fat: 0.2g | Monounsaturated Fat: 0.2g | Sodium: 295mg | Potassium: 41mg | Fiber: 1g | Sugar: 0.1g | Vitamin A: 78IU | Vitamin C: 0.1mg | Calcium: 6mg | Iron: 0.4mg
